


不错呦!smile@林凯西,确保“准备文件”中的几个文件都有安装,S...您好,看了您这篇帖子觉得很有帮助。但是有个问题想请...我的修改过了怎么还被恶意注册呢 @jjjjiiii 用PJ快9年了,主要是A...PJ3啊,貌似很少有人用PJ了,现在不是WP就是z...@332347365,我当时接入时错误码没有-10...楼主,ChkValue值应为-103是什么意思呢?...大哥 你最近能看到我发的信息,请跟我联系,我有个制...
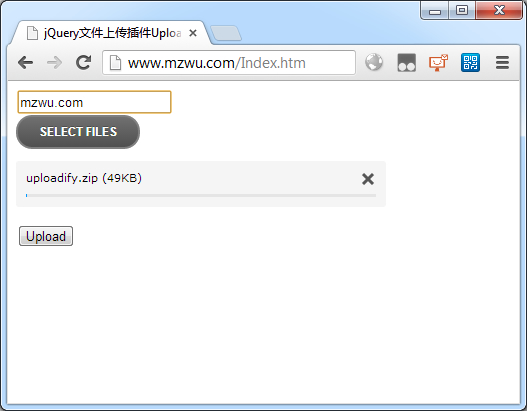
jQuery文件上传插件Uploadify使用示例
编辑:dnawo 日期:2013-09-24
Index.htm:
Upload.ashx:
上边方法的优点是参数和文件能一起上传到服务器,当页面只上传一个文件时处理起来比较简单,若要上传多个文件则不能用这个方法,因为Uploadify每次只能上传一个文件,每传一个文件参数都会提交一次,这时,参数和文件最好分开传:
上面两个方法表单提交都依赖于文件上传,所以,当文件上传是可选时,上面两个方法都不能用,这时可参见《同一页面多个Uploadify实例+表单提交示例》。
以上代码在Uploadify v3.2.1测试通过。
参考资料
[1].Uploadify:http://www.uploadify.com/
[2].Documentation:http://www.uploadify.com/documentation/
复制内容到剪贴板 程序代码
程序代码
程序代码<!DOCTYPE html>
<html xmlns="http://www.w3.org/1999/xhtml">
<head>
<title>jQuery文件上传插件Uploadify使用示例 - MZWU.COM</title>
<link type="text/css" rel="stylesheet" href="/Scripts/uploadify/uploadify.css" />
<script type="text/javascript" src="/Scripts/jquery-1.7.2.min.js"></script>
<script type="text/javascript" src="/Scripts/uploadify/jquery.uploadify.min.js"></script>
</head>
<body>
<input type="text" id="txt1" />
<input type="file" id="file1" />
<input type="button" id="btnUpload" value="Upload" />
<script type="text/javascript">
$(document).ready(function () {
//1.配置
$("#file1").uploadify({
swf: "/Scripts/uploadify/uploadify.swf",
uploader: "/Upload2.ashx",
fileTypeExts: "*.apk;*.zip;*.rar;*.7z",
fileSizeLimit: "10MB",
uploadLimit: 1,
auto: false,
multi: false,
onUploadStart: function () {
$("#file1").uploadify("settings", "formData", {
txt1: $("#txt1").val(),
t: (new Date()).getTime()
});
},
onUploadError : function(file, errorCode, errorMsg){
alert(file.name + "上传失败!" + errorCode + ":" + errorMsg);
},
onUploadSuccess: function (file, data) {
alert(file.name + "上传成功!");
}
});
//2.上传
$("#btnUpload").click(function () {
$("#file1").uploadify("upload");
});
});
</script>
</body>
</html>
Upload.ashx:
复制内容到剪贴板 程序代码
程序代码using System;
using System.Collections.Generic;
using System.Linq;
using System.Web;
namespace com.mzwu.www
{
public class Upload : IHttpHandler
{
public void ProcessRequest(HttpContext context)
{
JSONResult result = new JSONResult() { stat = -1, msg = "" };
try
{
HttpPostedFile file = context.Request.Files["Filedata"];//固定Filedata
file.SaveAs(context.Server.MapPath(file.FileName));
result.stat = 1;
}
catch (Exception ex)
{
result.msg = ex.Message;
}
context.Response.Write(result.ToString());
}
public bool IsReusable
{
get
{
return false;
}
}
}
public class JSONResult
{
public int stat { get; set; }
public string msg { get; set; }
public override string ToString()
{
return string.Format("{{\"stat\":{0},\"msg\":\"{1}\"}}", stat, msg);
}
}
}
上边方法的优点是参数和文件能一起上传到服务器,当页面只上传一个文件时处理起来比较简单,若要上传多个文件则不能用这个方法,因为Uploadify每次只能上传一个文件,每传一个文件参数都会提交一次,这时,参数和文件最好分开传:
复制内容到剪贴板 程序代码
程序代码<script type="text/javascript">
$(document).ready(function () {
//1.配置
$("#file1").uploadify({
swf: "/Scripts/uploadify/uploadify.swf",
uploader: "/Upload.ashx",
auto: false,
onQueueComplete: function (queueData) {
if (queueData.uploadsErrored == 0) {
//全部文件上传完成,这边单独提交参数
}
}
});
//2.上传
$("#btnUpload").click(function () {
$("#file1").uploadify("upload", "*");
});
});
</script>
上面两个方法表单提交都依赖于文件上传,所以,当文件上传是可选时,上面两个方法都不能用,这时可参见《同一页面多个Uploadify实例+表单提交示例》。
以上代码在Uploadify v3.2.1测试通过。
参考资料
[1].Uploadify:http://www.uploadify.com/
[2].Documentation:http://www.uploadify.com/documentation/
 上一篇: Javascript跨站读取数据两种解决方法
 下一篇: 同一页面多个Uploadify实例+表单提交示例
 文章来自: 本站原创
 Tags:
Tags:  最新日志:
最新日志:
评论: 0 | 引用: 0 | 查看次数: 4494
发表评论
请登录后再发表评论!

